Rhythmic Gymnastics Ribbon
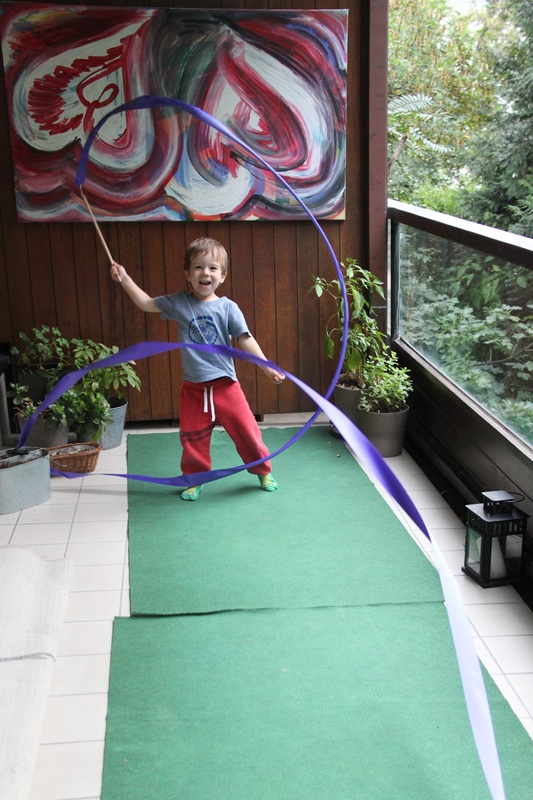
Why do I need a ribbon, you might ask. I asked myself too before I made this one. Now my kids want two more. It's so much fun, and quite an exercise! Try it yourself. You will need:
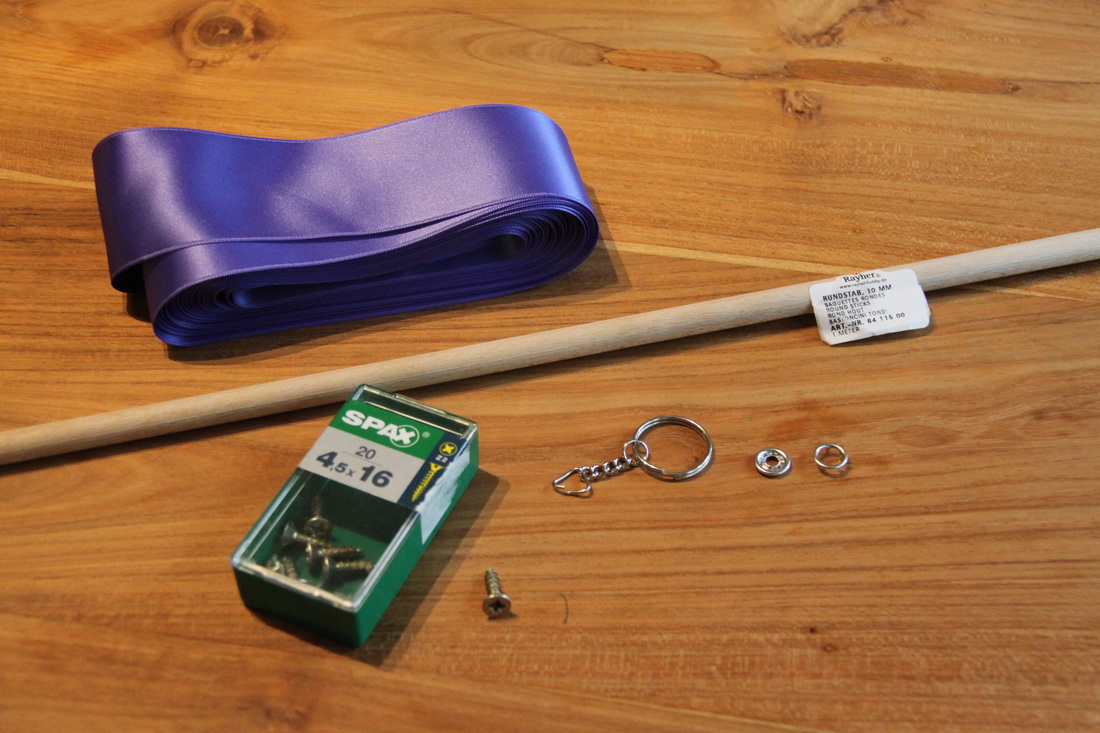
1. A ribbon (I'm sure you've already guessed that one). Here what Wikipedia says on the ribbon requirements:
The Ribbon is made of satin or another similar material cloth of any colour, it may be multi-coloured and have designs on it. The ribbon itself must be at least 35g (1 oz), 4–6 cm (1.6–2.4") in width and for senior category a minimum length of 6m (20') (5m (16.25') for juniors).
The ribbon must be in one piece. The end that is attached to the stick is doubled for a maximum length of 1m (3'). This is stitched down both sides. At the top, a very thin reinforcement or rows of machine stitching for a maximum length of 5 cm is authorized. This extremity may end in a strap, or have an eyelet (a small hole, edged with buttonhole stitch or a metal circle), to permit attaching the ribbon).
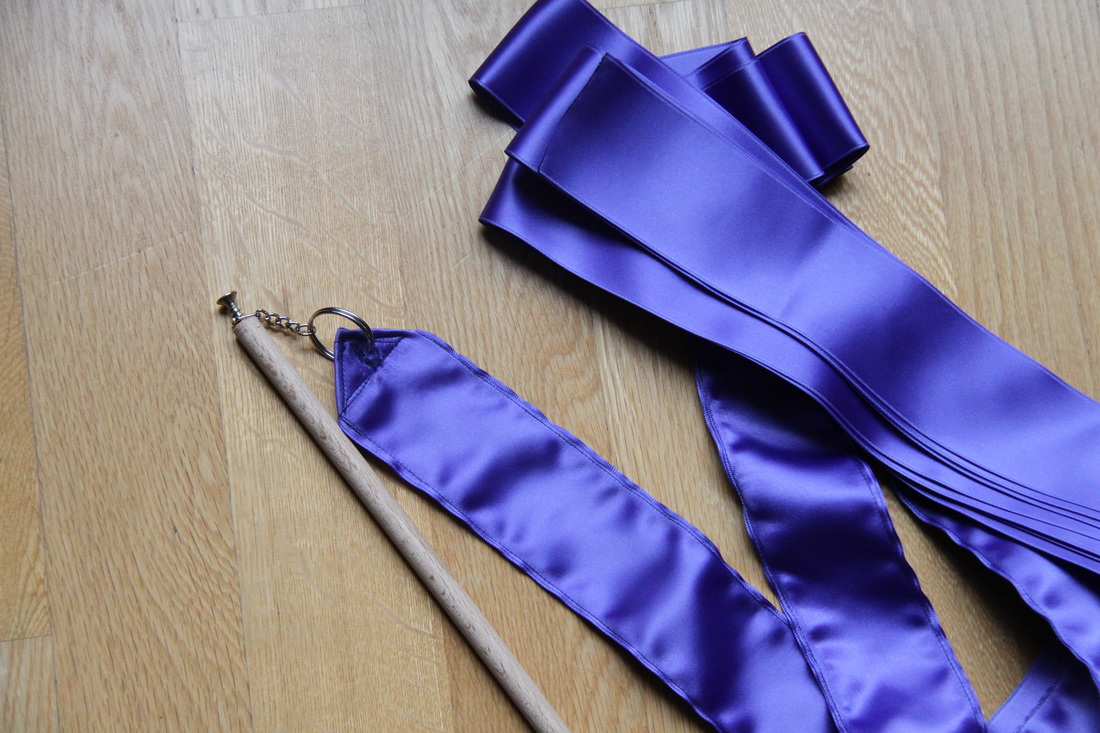
2. A stick.
This can be of any colour and made of wood, bamboo or plastic with a maximum diameter of 1 cm (2/5") at its widest, a cylindrical or conical shape and should have a length of 50–60cm (20–24") (including the fastening ring). The bottom end of the stick may be covered by an adhesive, anti-slip tape or may have a rubber handle for a maximum length of 10 cm (4") at the level of the grip. I used a plain dowel from the craft shop that I cut with a serrated knife :D
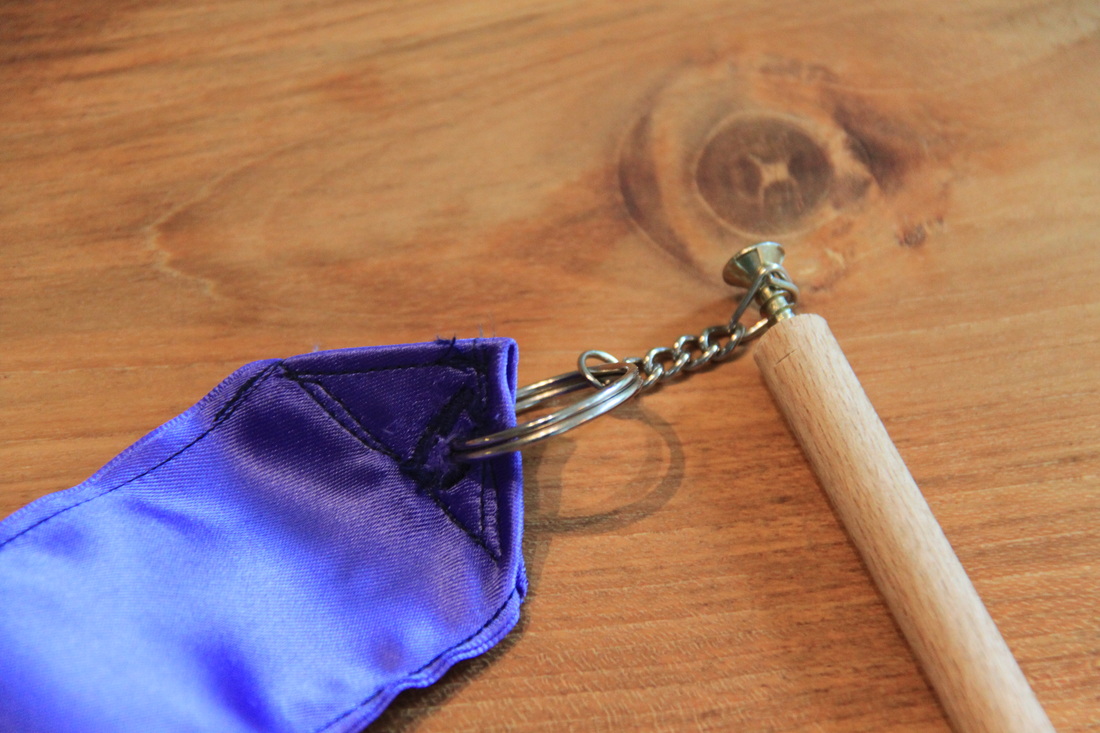
3. Connection from the ribbon to the stick. I used a screw (a hook with a screw end would have been better) and an old key chain. According to the rules,the top of the stick, where the ribbon will be attached, may consist of:
1. A ribbon (I'm sure you've already guessed that one). Here what Wikipedia says on the ribbon requirements:
The Ribbon is made of satin or another similar material cloth of any colour, it may be multi-coloured and have designs on it. The ribbon itself must be at least 35g (1 oz), 4–6 cm (1.6–2.4") in width and for senior category a minimum length of 6m (20') (5m (16.25') for juniors).
The ribbon must be in one piece. The end that is attached to the stick is doubled for a maximum length of 1m (3'). This is stitched down both sides. At the top, a very thin reinforcement or rows of machine stitching for a maximum length of 5 cm is authorized. This extremity may end in a strap, or have an eyelet (a small hole, edged with buttonhole stitch or a metal circle), to permit attaching the ribbon).
2. A stick.
This can be of any colour and made of wood, bamboo or plastic with a maximum diameter of 1 cm (2/5") at its widest, a cylindrical or conical shape and should have a length of 50–60cm (20–24") (including the fastening ring). The bottom end of the stick may be covered by an adhesive, anti-slip tape or may have a rubber handle for a maximum length of 10 cm (4") at the level of the grip. I used a plain dowel from the craft shop that I cut with a serrated knife :D
3. Connection from the ribbon to the stick. I used a screw (a hook with a screw end would have been better) and an old key chain. According to the rules,the top of the stick, where the ribbon will be attached, may consist of:
- a supple strap (of string or nylon) held in place by a nylon thread wound round the stick for a maximum 5 cm (2").
- a metal ring fixed directly onto the stick.
- a metal ring (vertical, horizontal or oblique) fixed to the stick by two metal pins held in place by nylon or metallic thread round wound around the stick for the maximum 5 cm (2").
- a metal ring (fixed, mobile or pivoting) or a supple strap, fixed to a metal tip of no more than 3 cm (1.2").
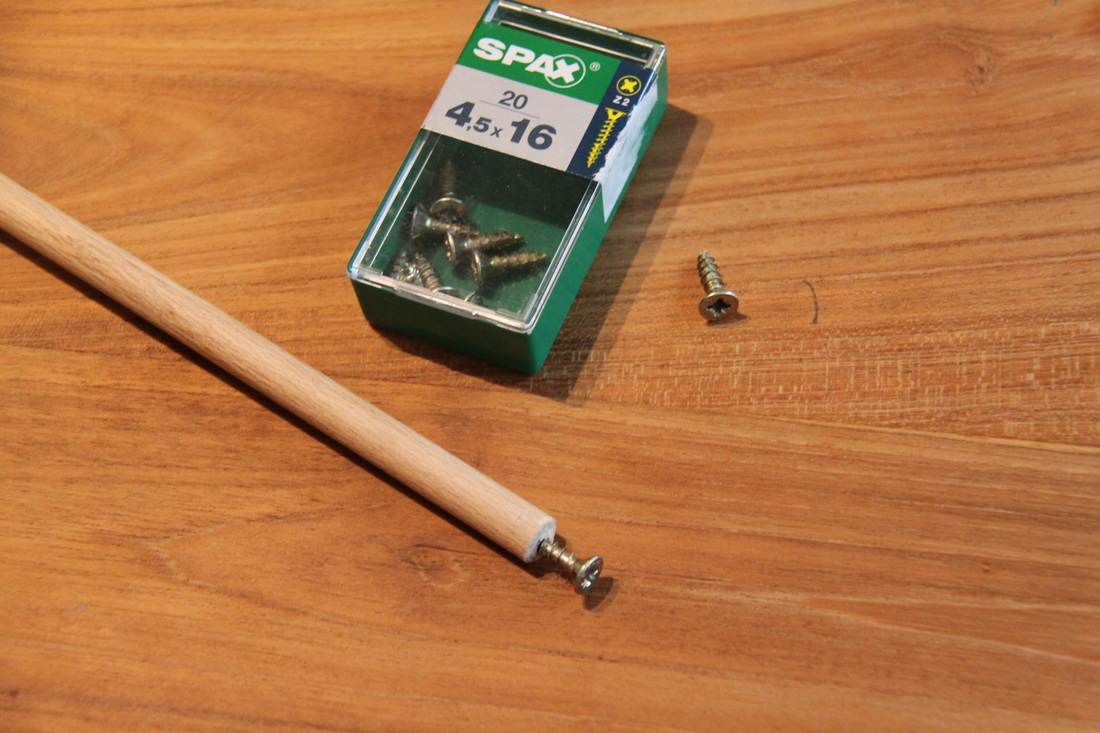
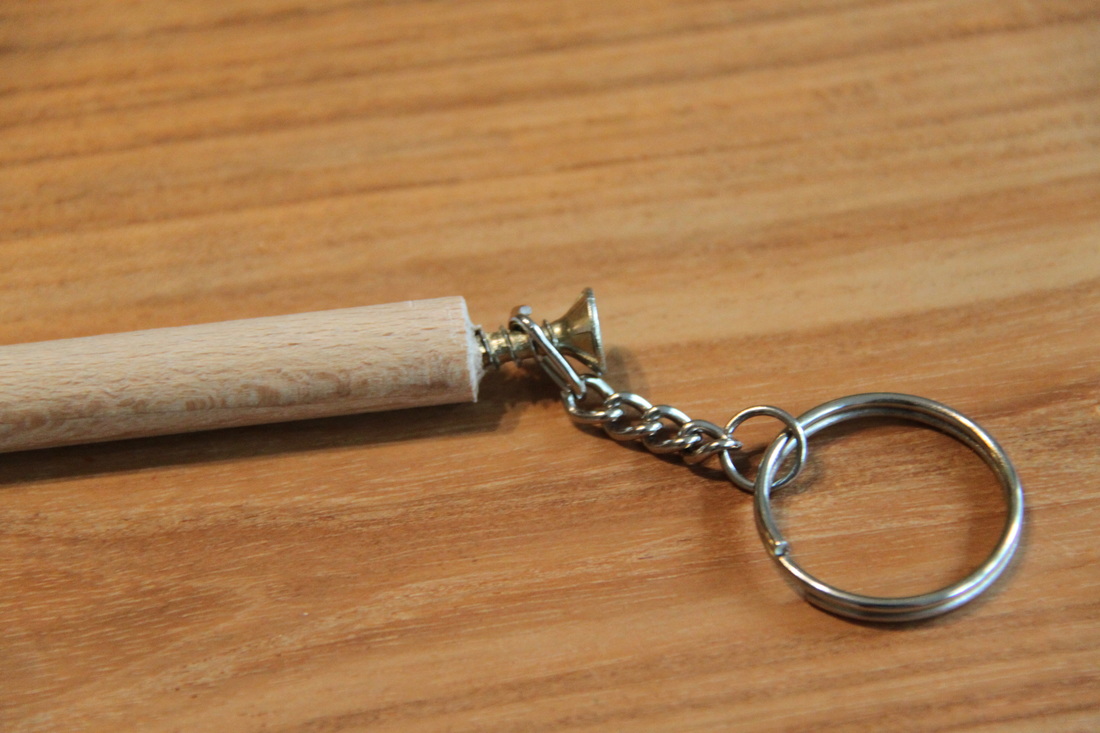
Step 1: attach your hook or screw on the dowel.
Step 2: add keychain.
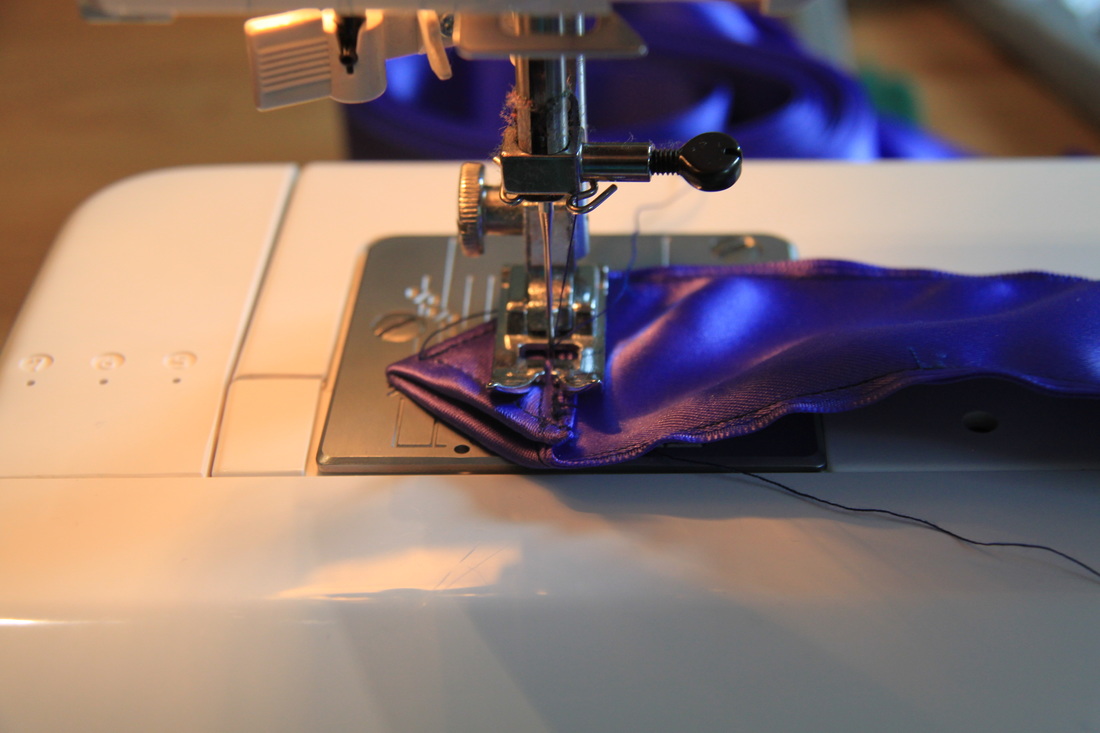
Step 3: measure your (up to) 1 meter of ribbon to be doubled.
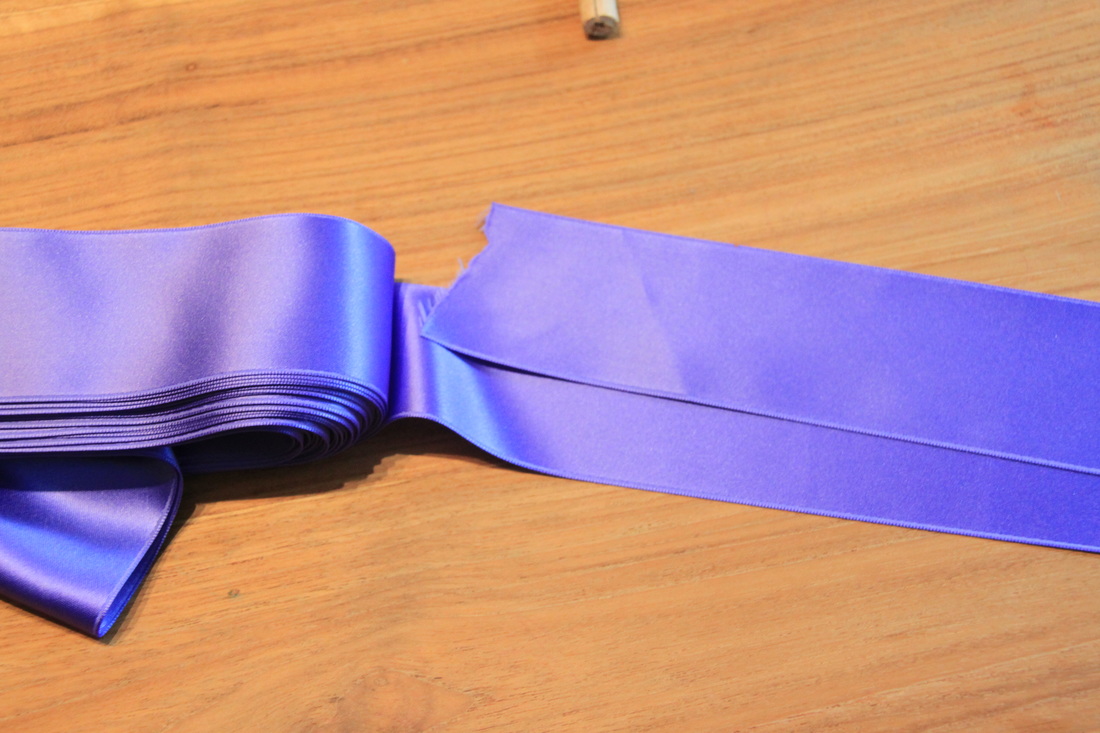
Step 4: fix the ends of the ribbon with a candle or glue.

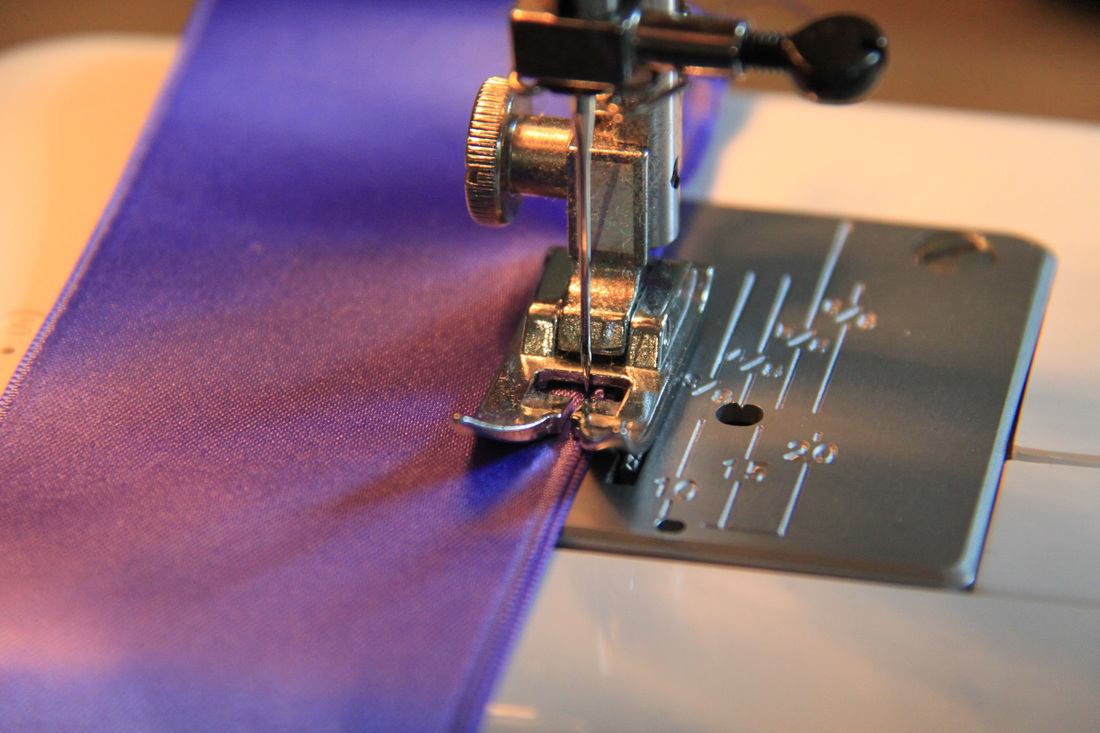
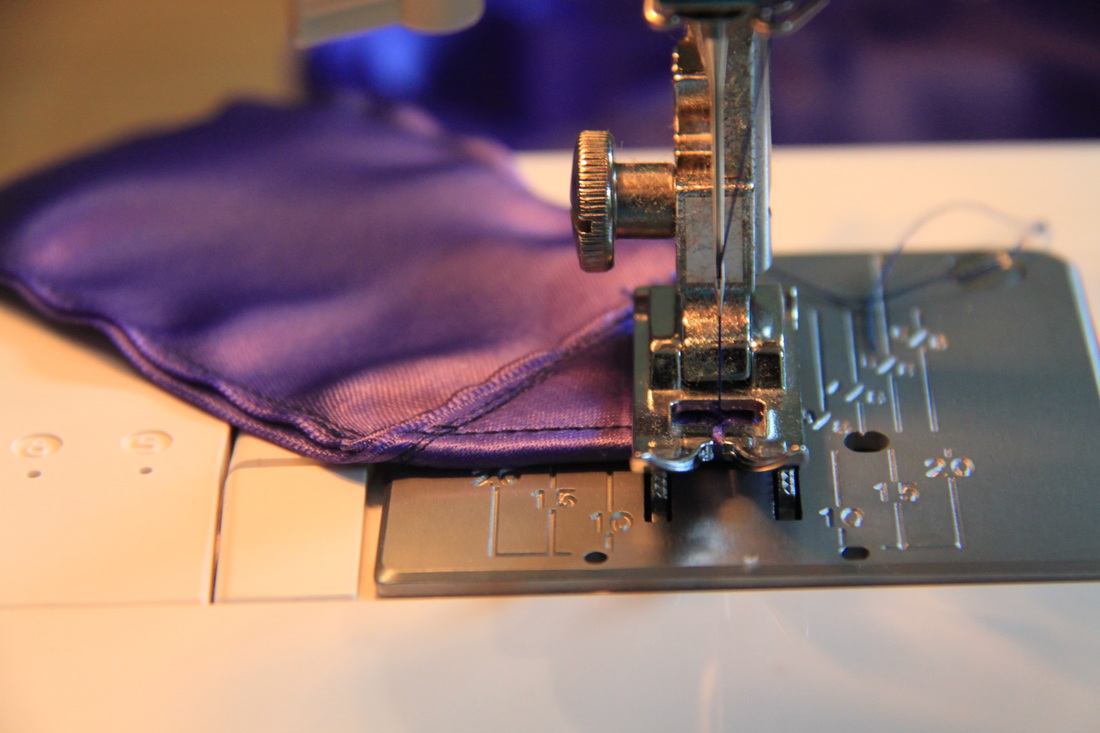
Step 5: Stitch together the doubled first meter of the ribbon.
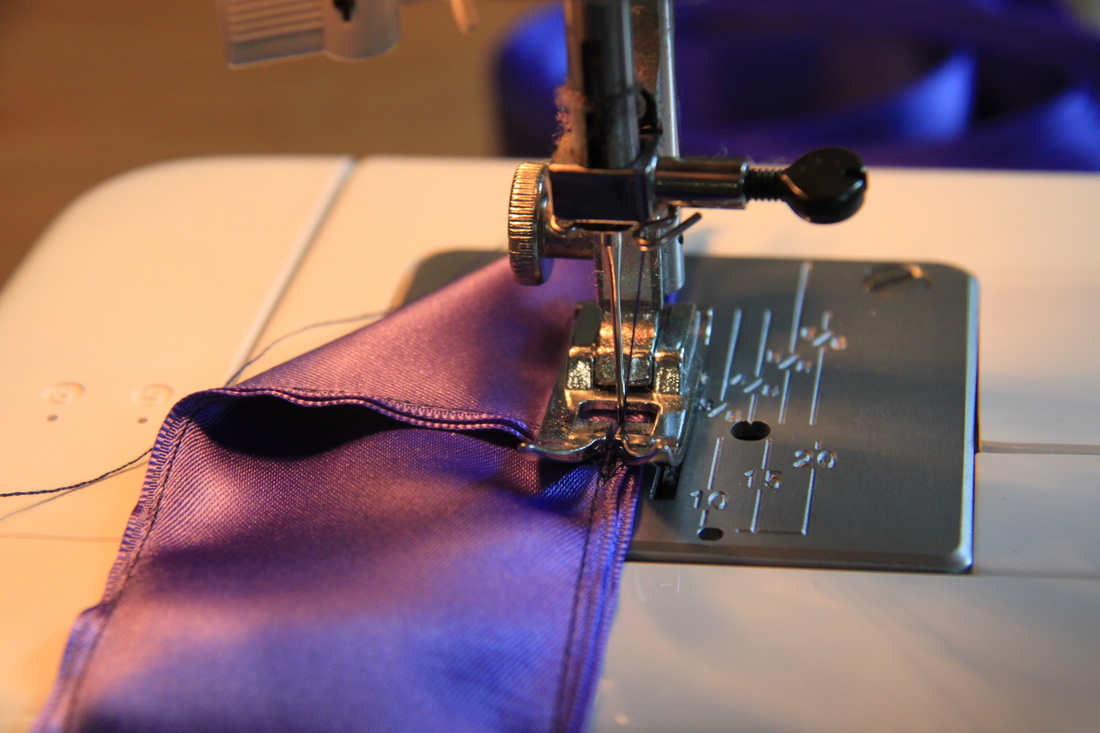
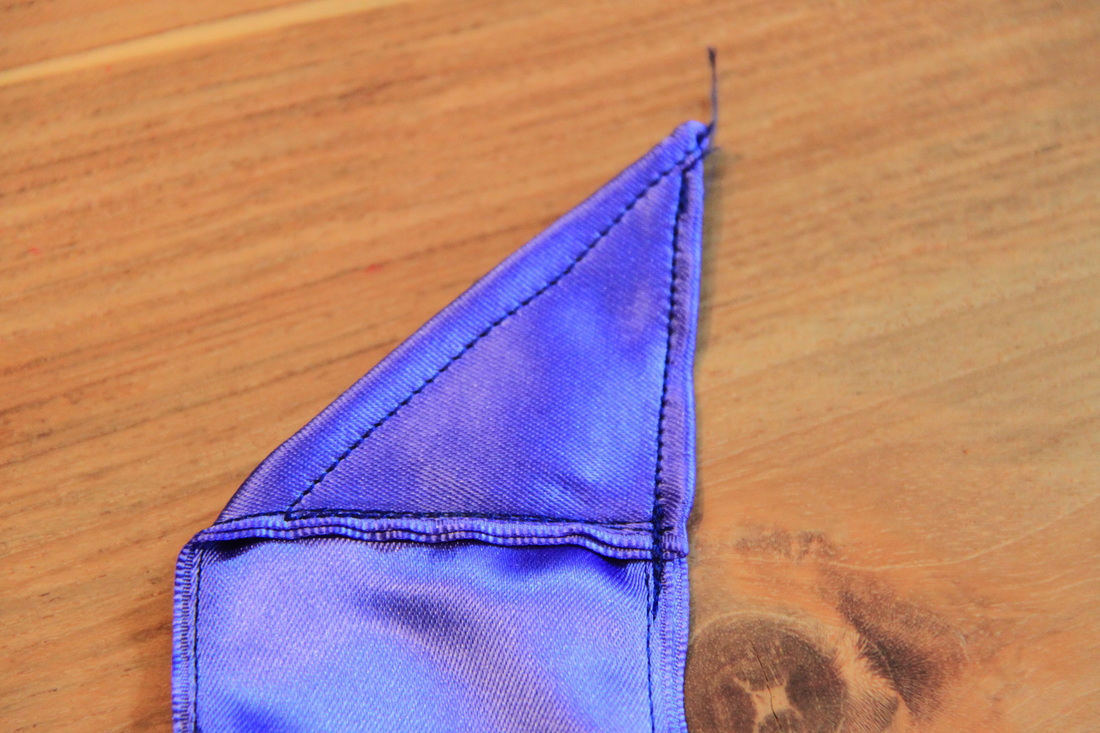
Step 6: Reinforce the end (up to 5 cm).
|
|
Step 7: Your eyelet. I had the intention of adding a metal circle with my Kam snap pliers, but my reinforcement resulted so thick I had to use a buttonhole instead. You can tell it's my first one, like, ever. But it gets the job done. Just attach your keychain to it.
Believe it or not, you are ready! Now go test it and enjoy. Or, you just get in line, cause your whole family wants to test it before you. Happy crafting!