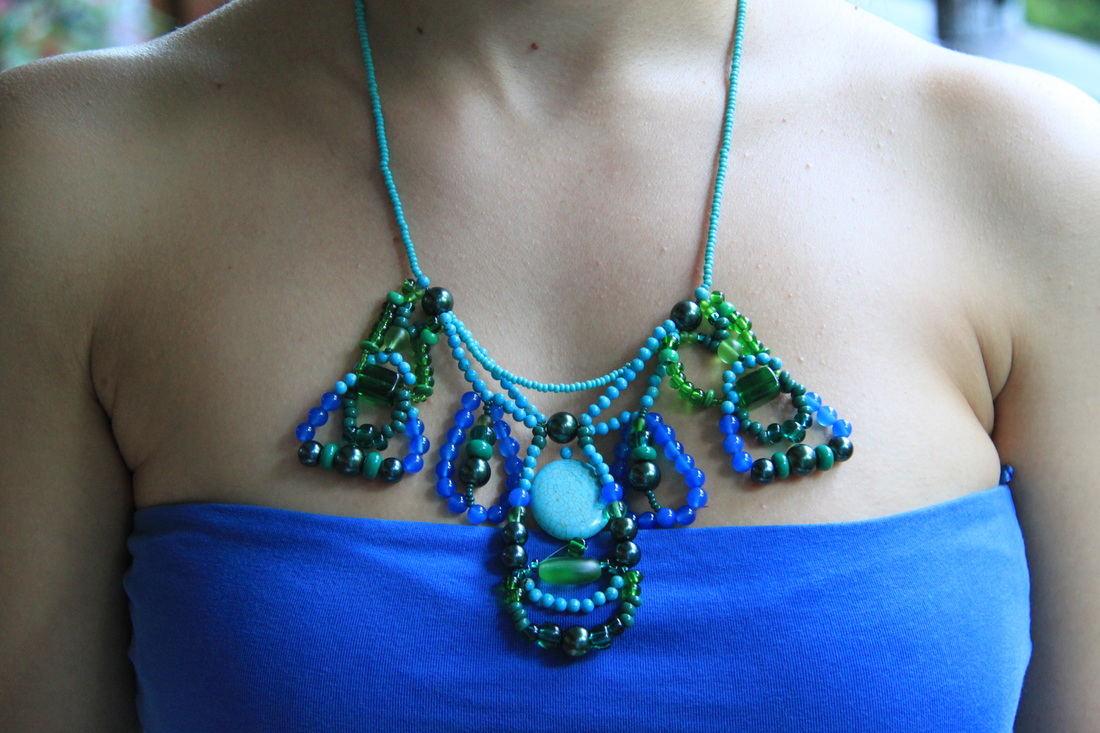
A resourceful site for free resources. TO made it!
  • Home
  • DIY, cause you can
    • Toys for babies, toddlers and grown-ups >
      • Easy cat toy
      • Recycled art giraffe
      • Owl decoration
      • Felt owl diy
      • Baby soft blocks
      • Felt horse
      • Felt flamingo
      • Crochet bunny
      • Crochet bear with lifesaver
      • Snow Globe
      • Felt Christmas tree
      • Christmas tree 2
      • Life-size nutcracker decoration
      • Pinecone ornaments
      • Pinecone wreath
      • Pinecone Christmas tree
      • DIY Christmas Stocking
      • DIY Easter Wreath
      • Snowflakes
      • Snowflakes 2
      • Garden in a box
      • Felt peacock
      • Sock monkey
      • Sock bunny
      • Stick constructor
      • Foam tomahawk
      • Gymnastics ribbon
      • Fishing game
      • Snowman keepsake
      • DIY Catapult
      • Project Dollhouse >
        • Dollhouse bathroom vanity
        • Bathroom vanity 2
        • Dollhouse sofas
        • Dollhouse bed
        • Dollhouse chandelier
        • Dollhouse fridge
        • Dollhouse furniture hinge
        • Dollhouse lampshade
        • Dollhouse kitchen chairs
    • Paper crafts >
      • Giant paper flowers
      • Dino Schultüte
      • Unicorn Schultüte
      • Pretty storage boxes
      • Christmas star
      • Easy paper star
      • Pirate ship cupcake stand
      • Pirate chest piñata
      • Housefly Piñata
      • Dragon piñata
      • Origami bouquet
      • 3D origami owl
      • How to weave a basket from newspapers
      • Balloon Clown
      • Flying birds
      • Cupcake stand
      • Cake pop stand
      • Paper basket
      • Paper butterflies
      • Diy Totem Pole
      • Paper headdress
      • Paper Carousel
      • Paper Ferris Wheel
      • Big Top Cake Pop Stand
    • Party ideas >
      • Harry Potter party
      • Flamingo party
      • Super Mario Party
      • Woodland Party
      • Owl party
      • Hello Kitty party
      • My Little Pony Party
      • Pirate party
      • Dinosaur party
      • Princess frog party
      • Little Red Riding Hood Party
      • Pow Wow Party
      • Circus Party
      • How to train your dragon party
      • Bugs Party
      • Lego Party
      • Party bowl
    • Accessories >
      • Heart necklaces
      • Soutache earrings DIY
      • Beaded statement necklace
      • No sew ball purse
      • Summer anklet
      • Tic Tac Toe Toilet Paper Holder
    • Halloween ideas >
      • Halloween Door Decor
      • DiY Top Hat
      • Skull Bag
      • The Incredibles
      • Spider costume
      • Family monster hats
      • Make-up
      • Easy Halloween decoration
      • Sweet Skeleton Toy
      • Toddler knight costume
    • Homemade cosmetics >
      • DIY Body Spray
      • Sugar scrubs
      • Bath salts
      • Dry Shampoo
    • Sewing patterns >
      • Sleeping mask
      • Easy toddler dress
      • Little Red Riding Hood Cape
      • Alice's apron
      • Bunny dress
      • Talisman bag
      • Toddler Dress Coat
      • Sitting pillows
      • Dirndl purse
      • Easy pillowcase
      • DIY Pom Pom Rug
      • Plant hanger DIY
      • 3D Butterfly Embroidery
  • Photography
    • Vienna Photo Marathon 2013
    • Vienna Photo Marathon 2014
    • Vienna Photo Marathon 2015
    • Vienna Photo Marathon 2016
    • VIenna Photo Marathon 2017
    • Vienna Photo Marathon 2018
    • Vienna Photo Marathon 2019
    • Vienna Photo Marathon 2020
    • Vienna Photo Marathon 2021
    • Black and white challenge
    • Black and white challenge 2
  • A cook without a book
    • Chia pudding
    • DIY Beeswax Wrap
    • Homemade hazelnut spread
    • Homemade cup-a-noodles
    • Gingerbread house template
    • Cookie balls
    • Homemade gummy bears
    • Peacock cake
    • Summer lemonade
    • Healthy sweets
    • Vegan cake
    • Cheese balls
    • Crackers
  • The blog of the block
  • Contact
    • Privacy Notice

Statement Necklace

Because there are times when you want to make something special.
Picture
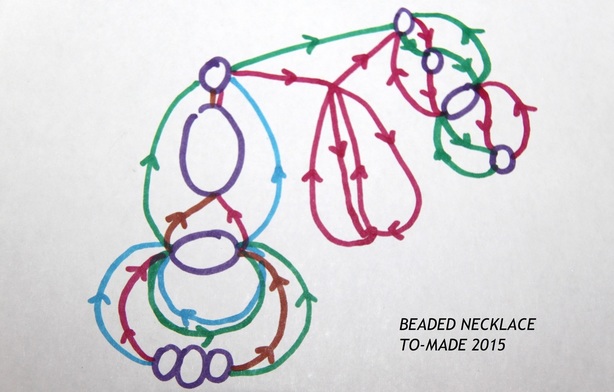
When I make jewellery, I always start with an idea. I draw an outline of what I think would look good. And then I usually change it as I go.
Picture
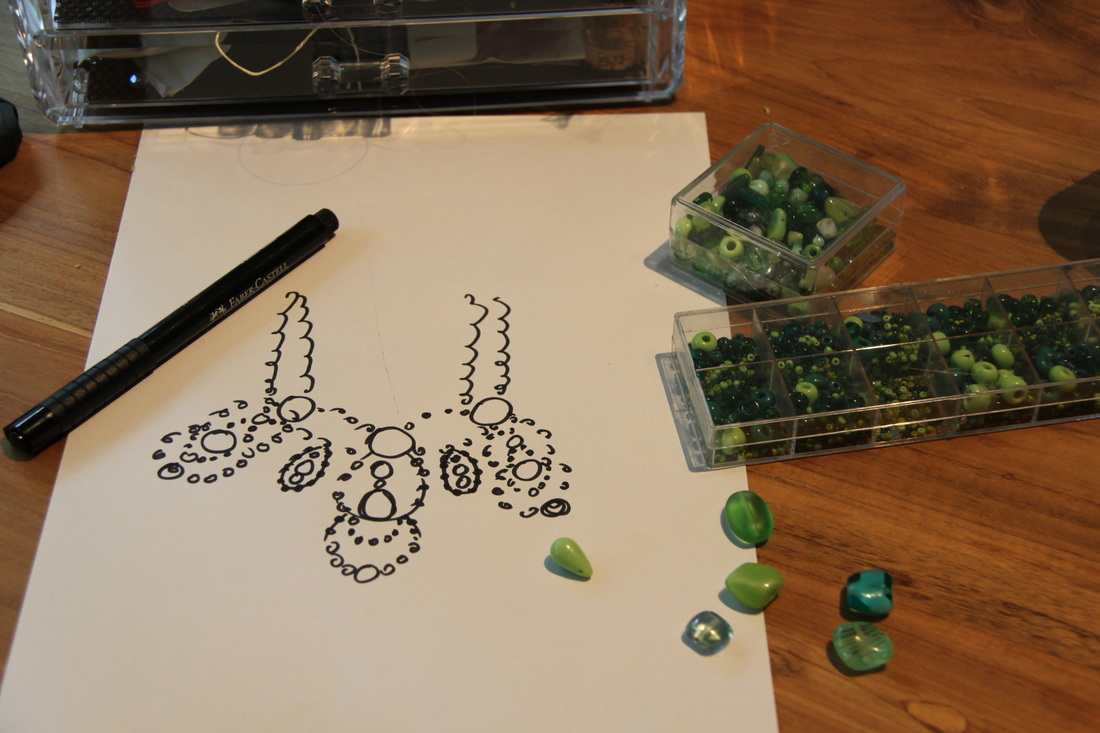
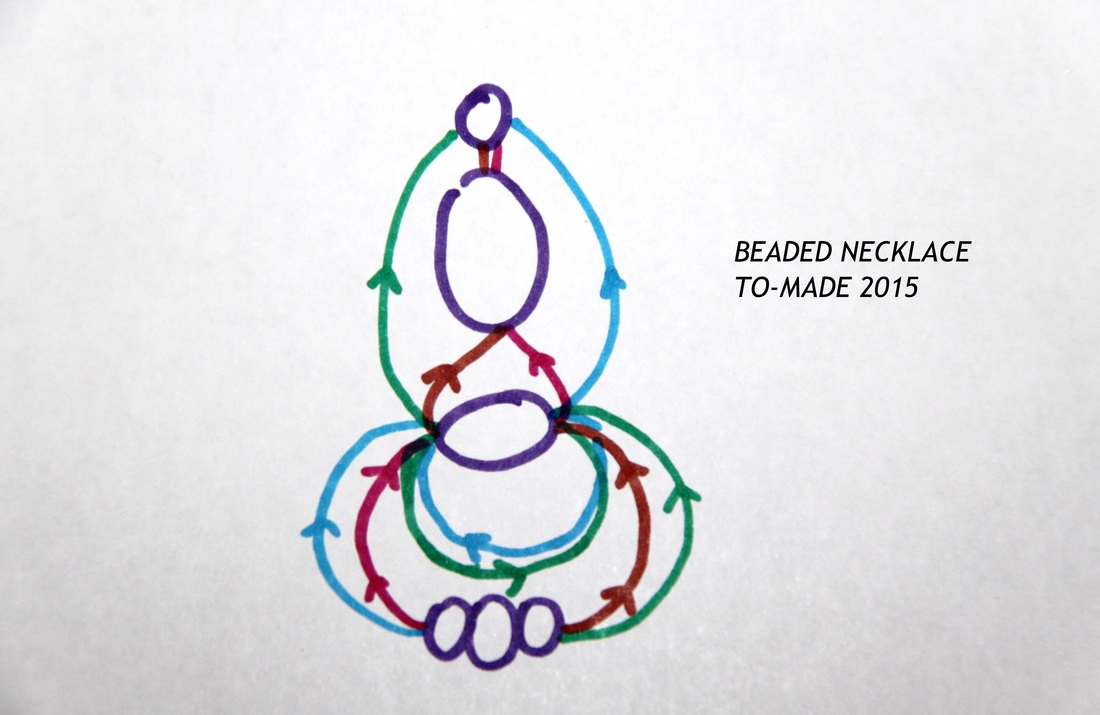
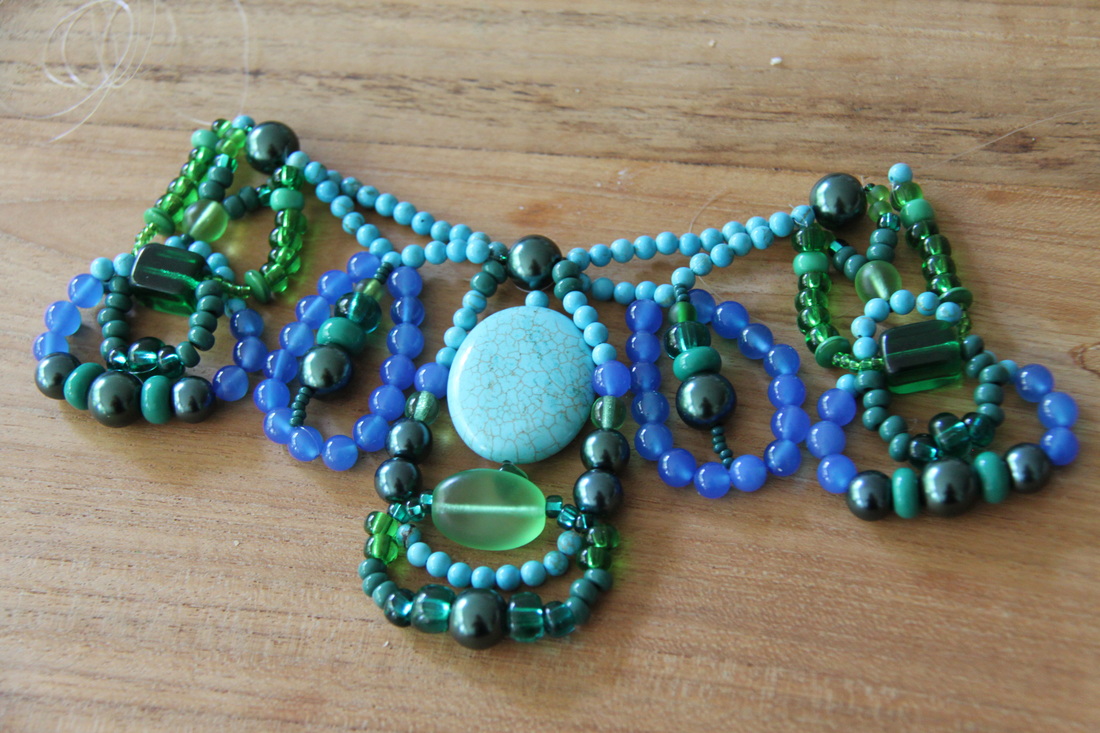
Here I drew an idea for a bold statement necklace. I looked at my beads stash and I started with two fishing cords and a lot of blue and green.
Picture
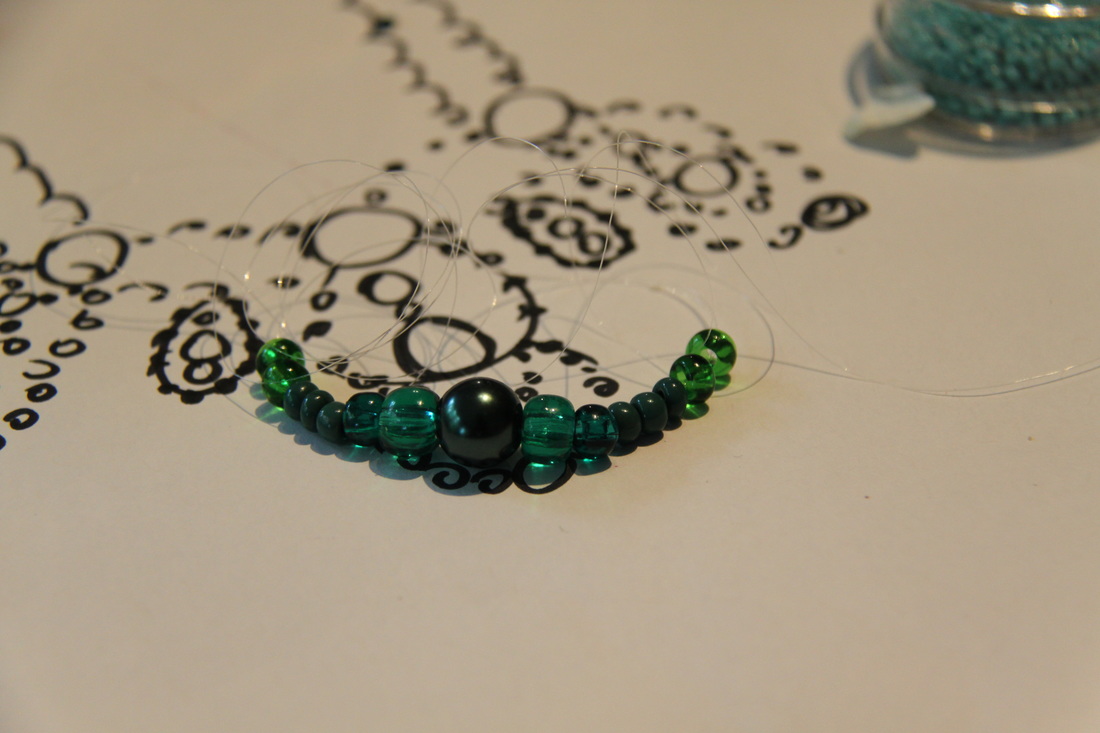
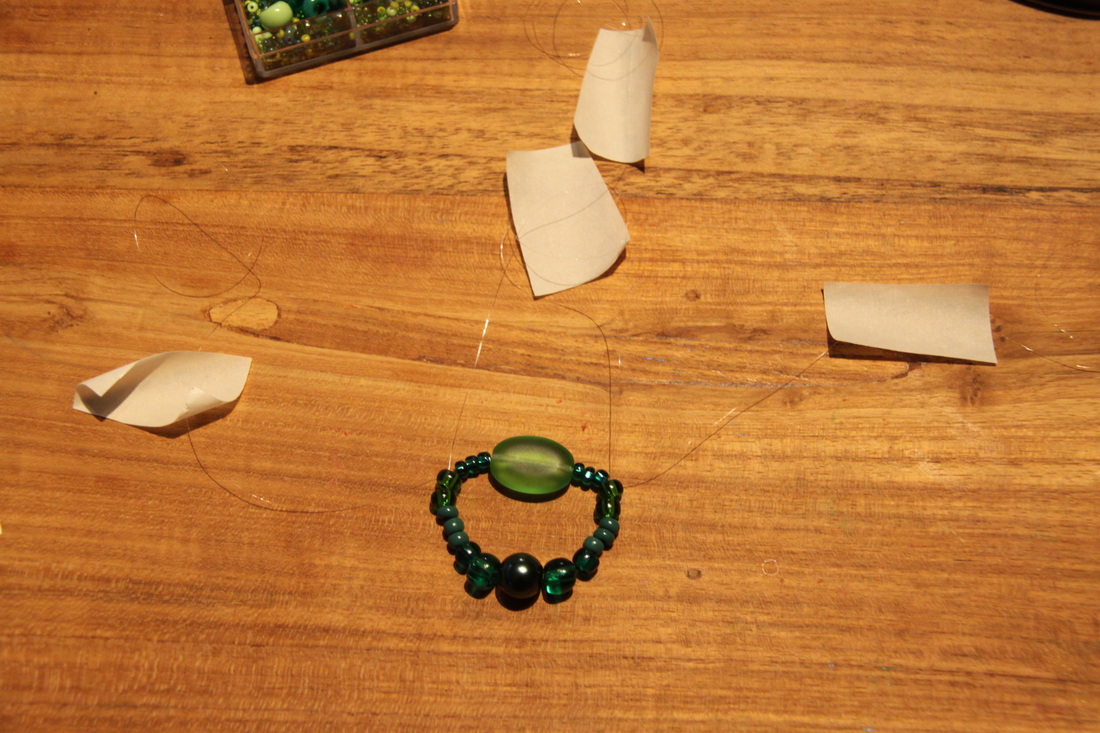
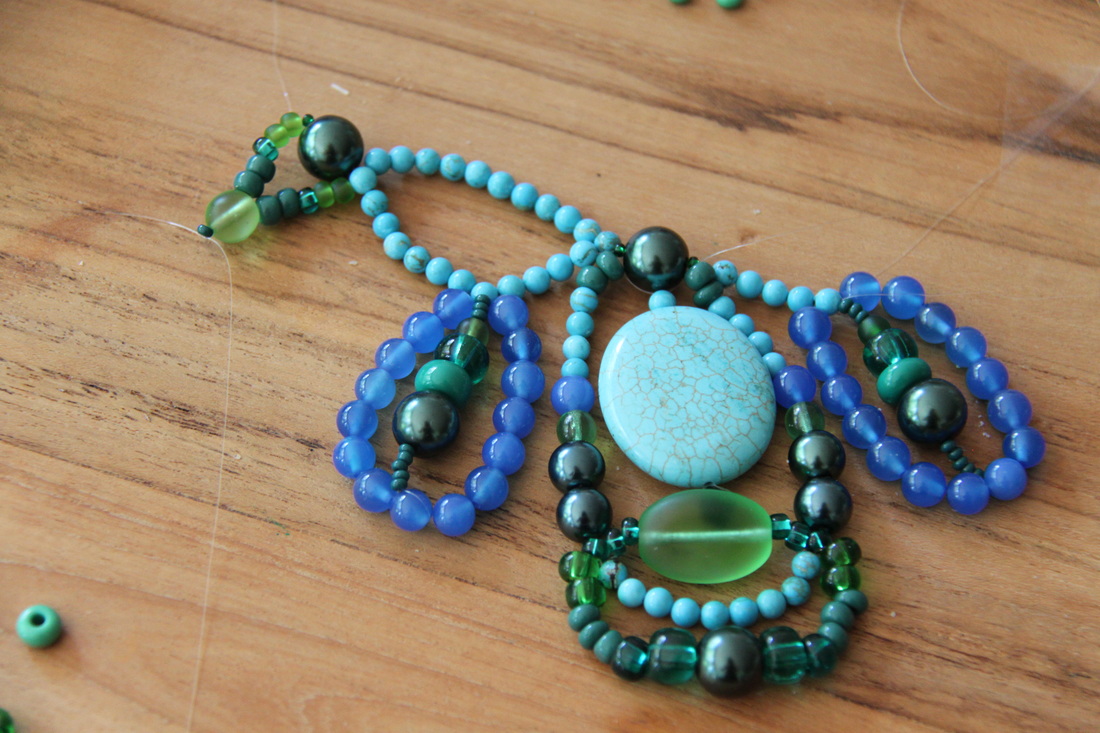
First comes the center element:
Picture
Picture
Picture
Picture
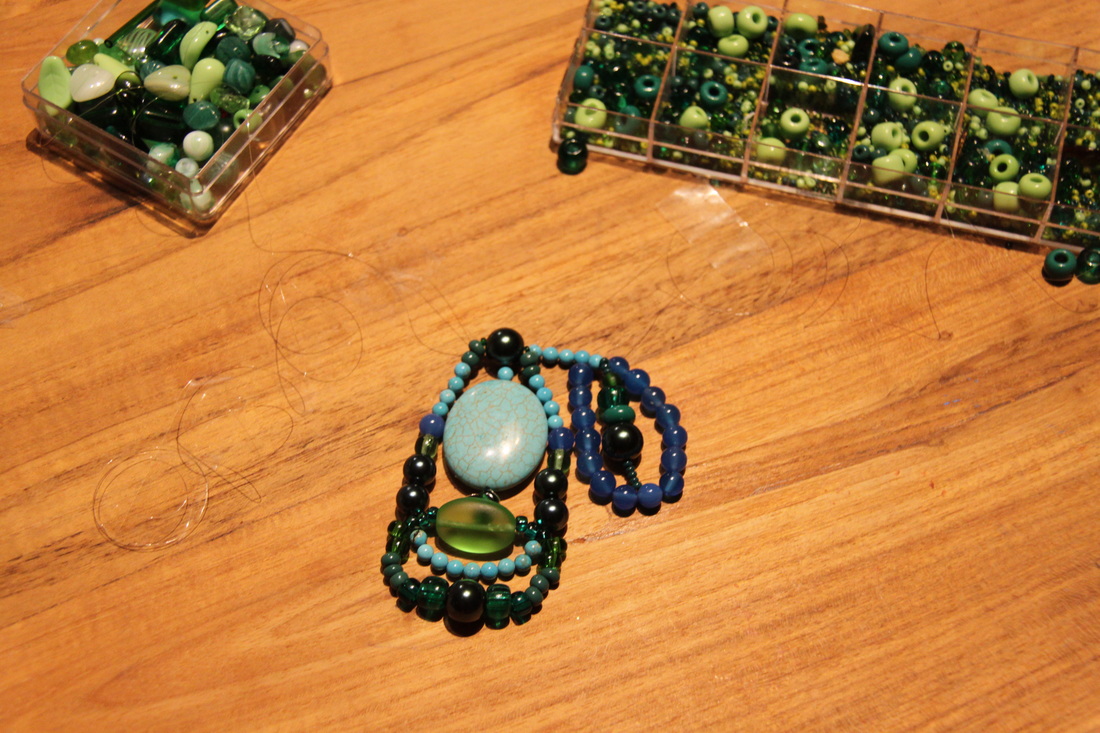
You should end up with something like this:
Picture
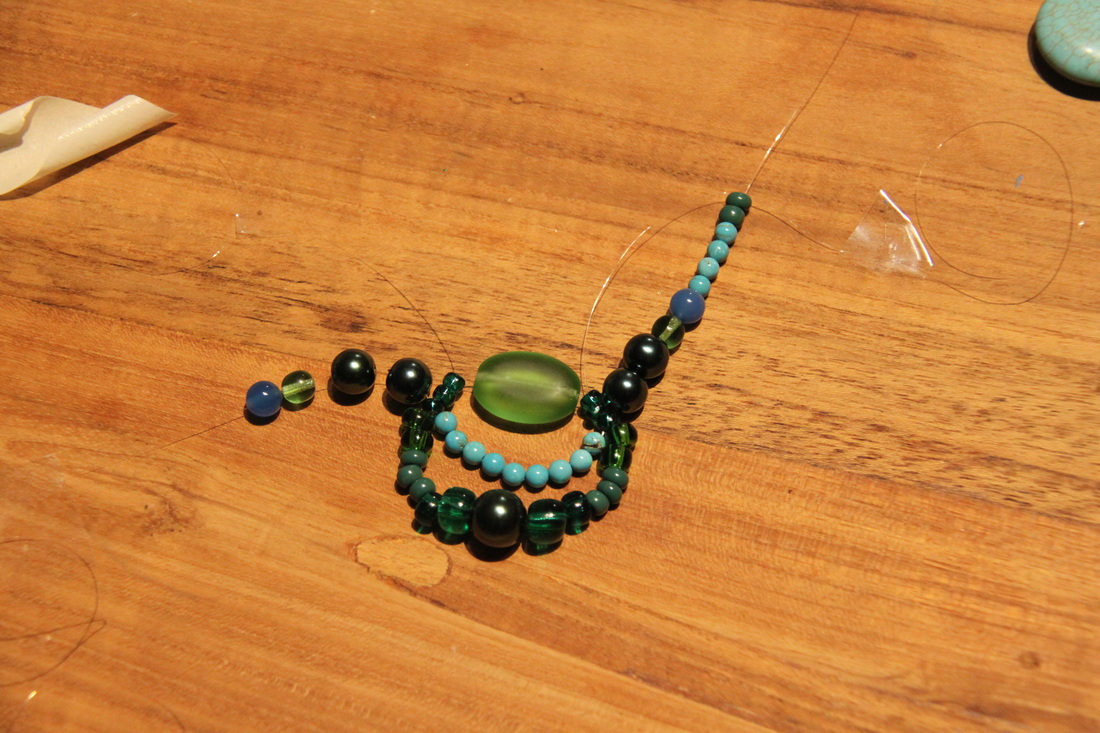
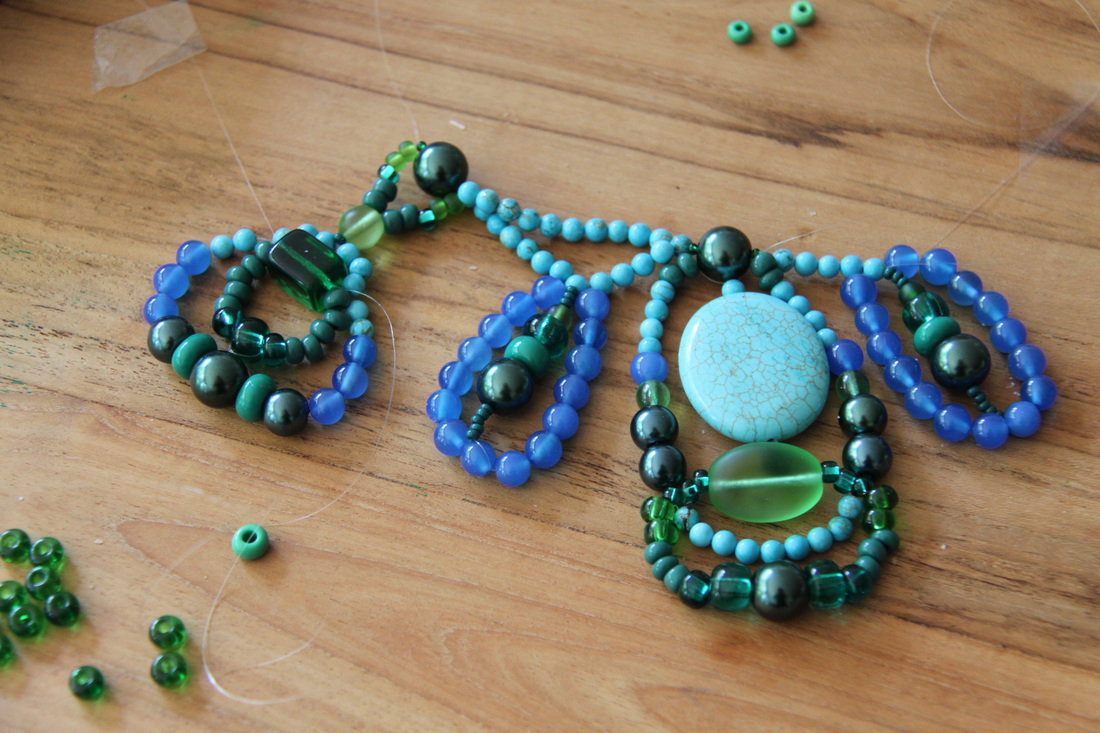
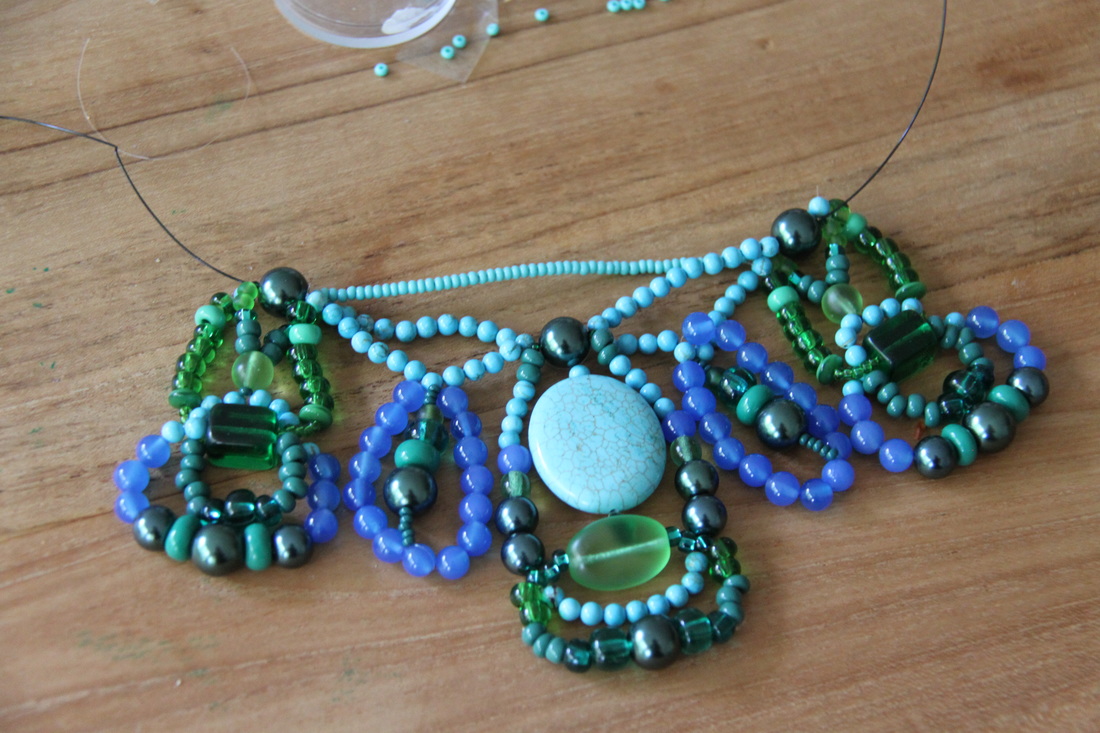
Then, start adding to the sides. Make sure you have a cord that can hold the weight of the necklace. I actually prefer to add new cord for each element, so if it breaks, only that element will have to be repaired. That being said, you have to be very good with knots - use a mini bead to make the knot every time you finish working with a piece of cord, and weave the rest in, if possible.
Picture
Picture
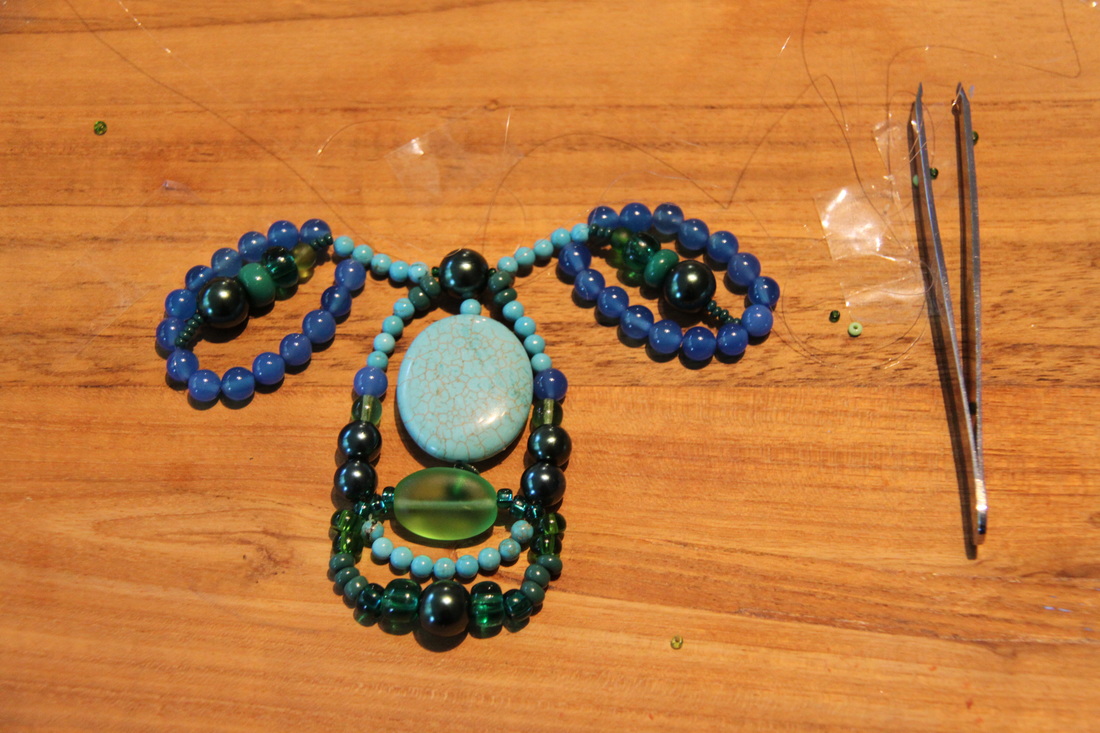
Here a general sketch of how element 2 looks like:
Picture
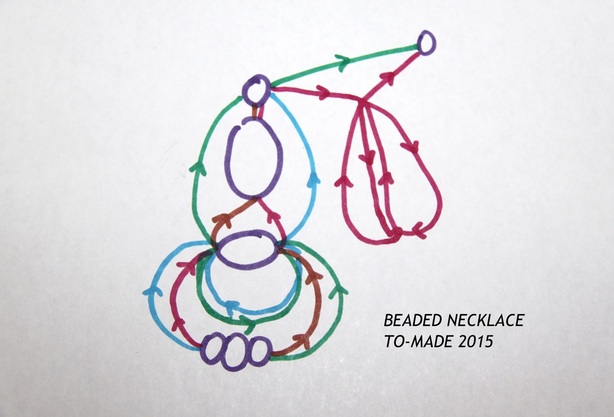
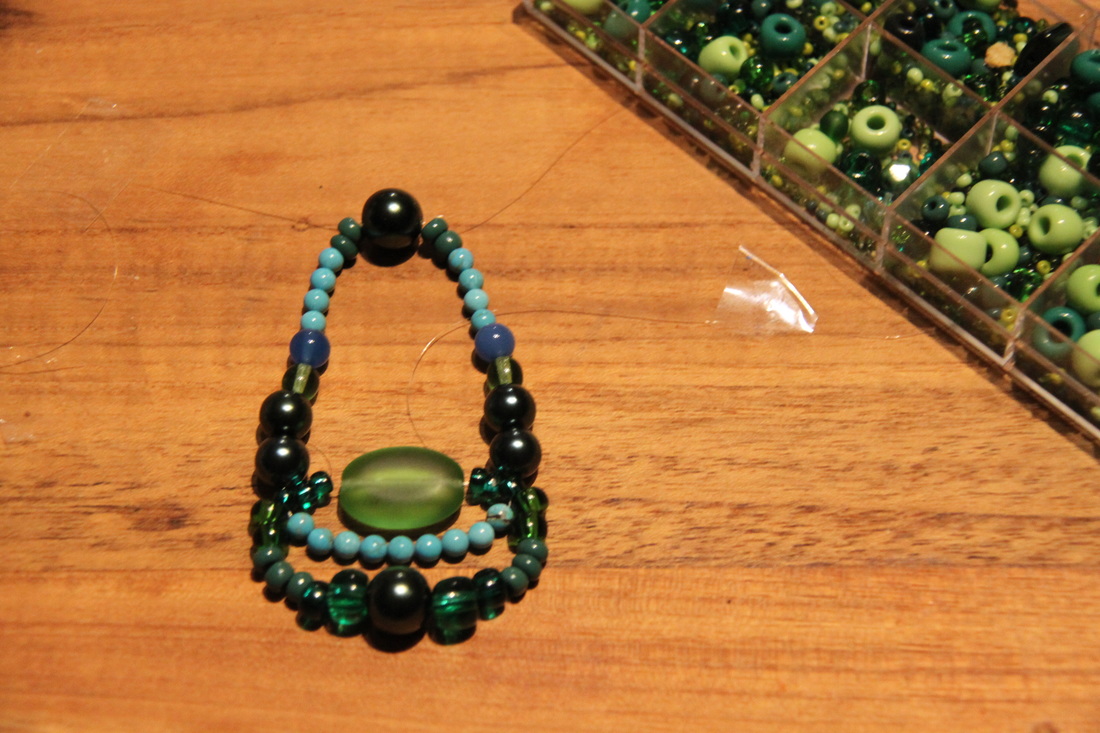
And off to element 3.
Picture
Picture
Picture
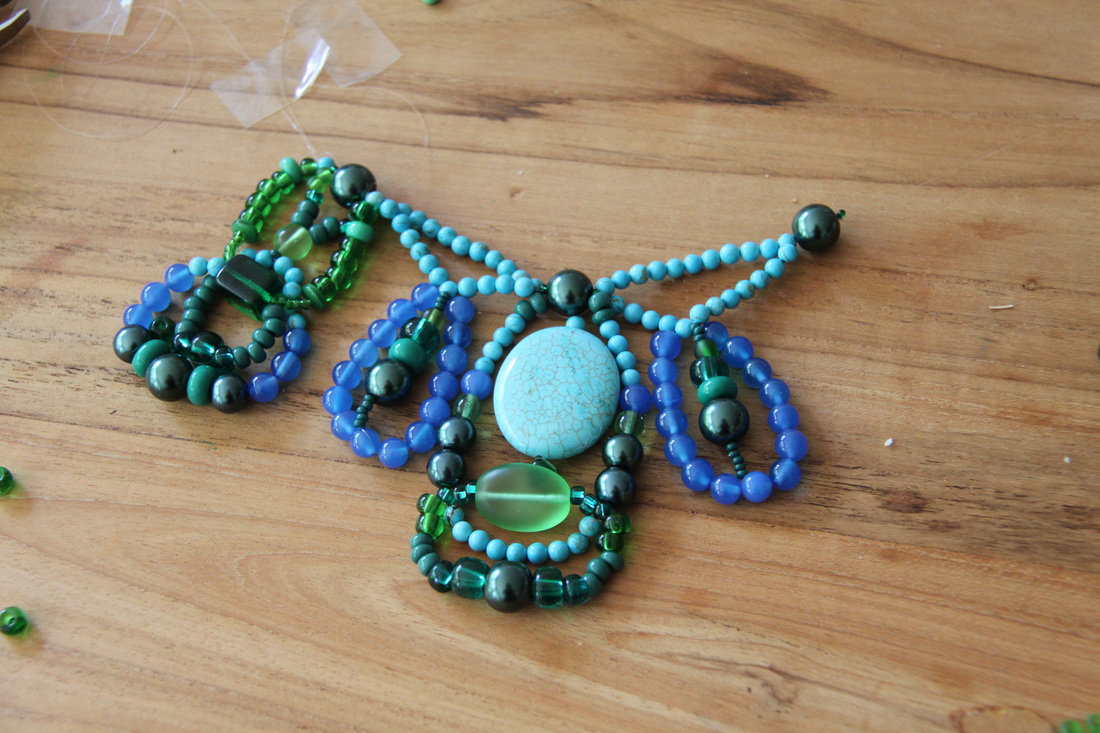
Again, you don't have to have it all on the two initial cords, this is just indicative on how to bead.
Picture
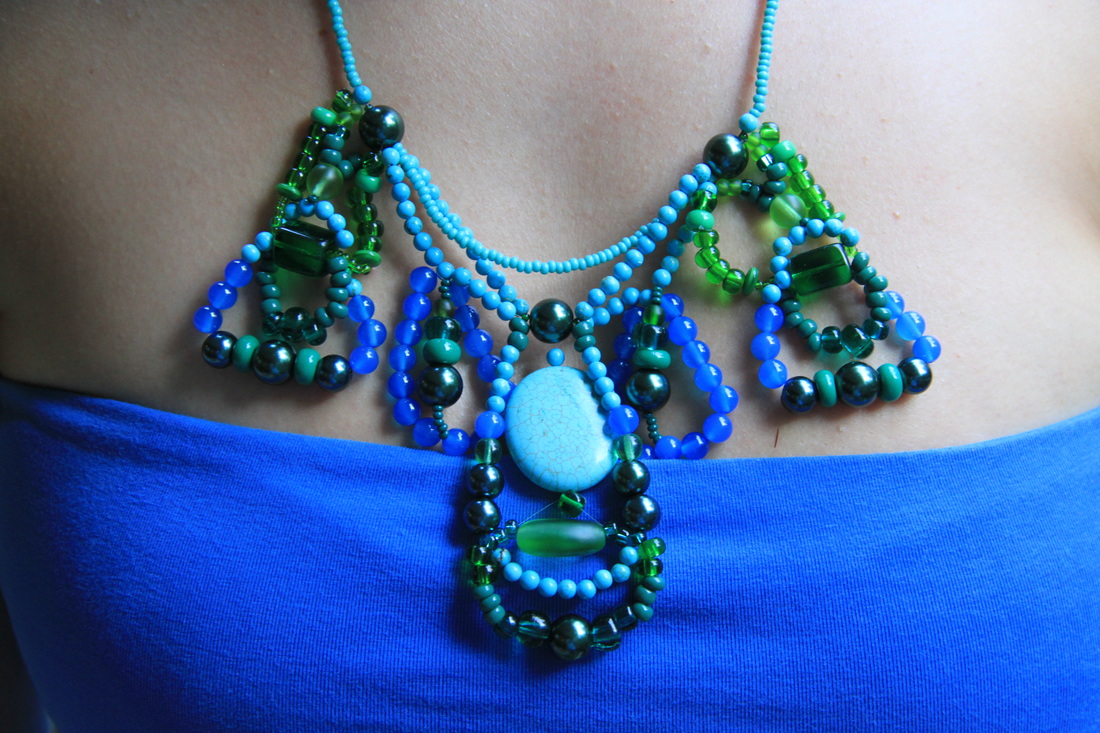
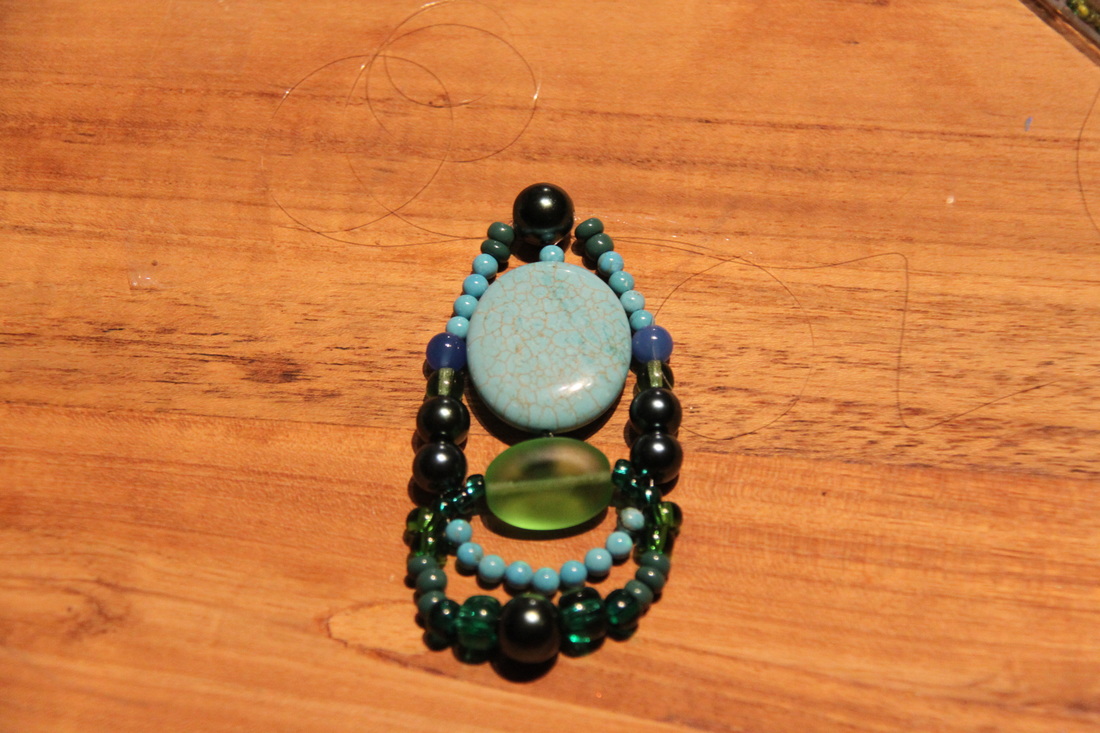
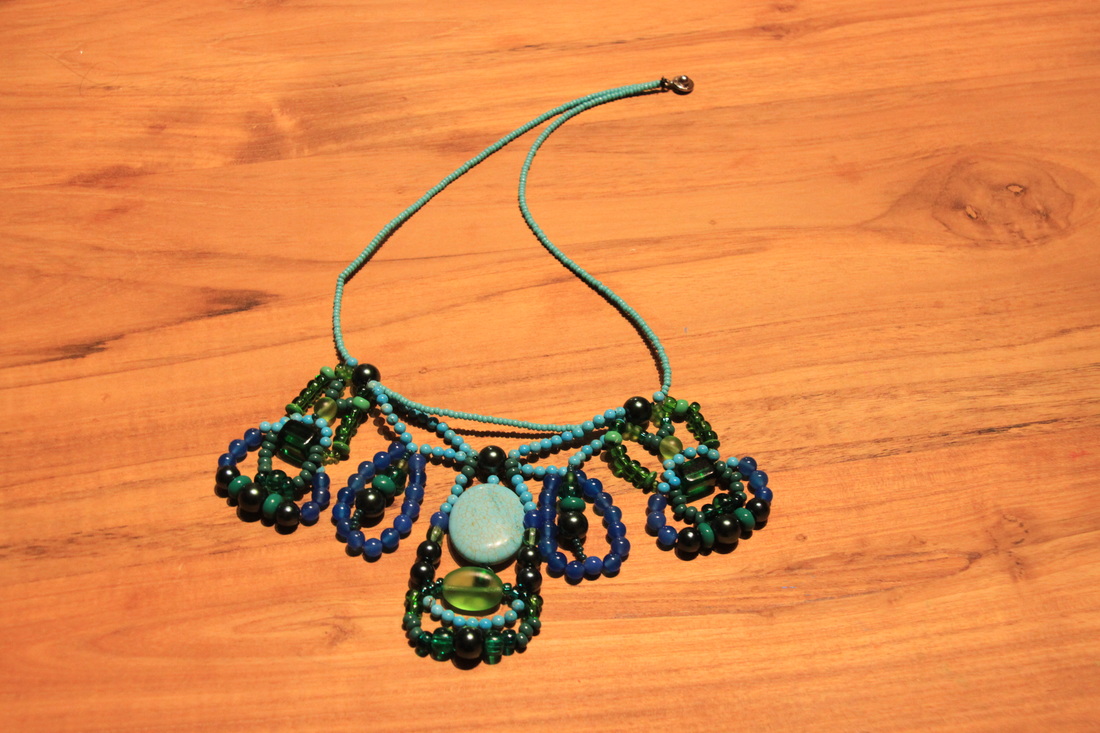
Now, repeat the same on both sides. You can lift the necklace from time to time to see how it would look hung. Optionally, you can decide to decrease the number of beads on the outer sides of element 3, so it looks nicer when worn.
Picture
To make sure it all holds, I added a thick wire to carry the weight of my beads.
Picture
I wanted my necklace longish, make sure you try yours on before you finish with a clasp.
Picture
Picture
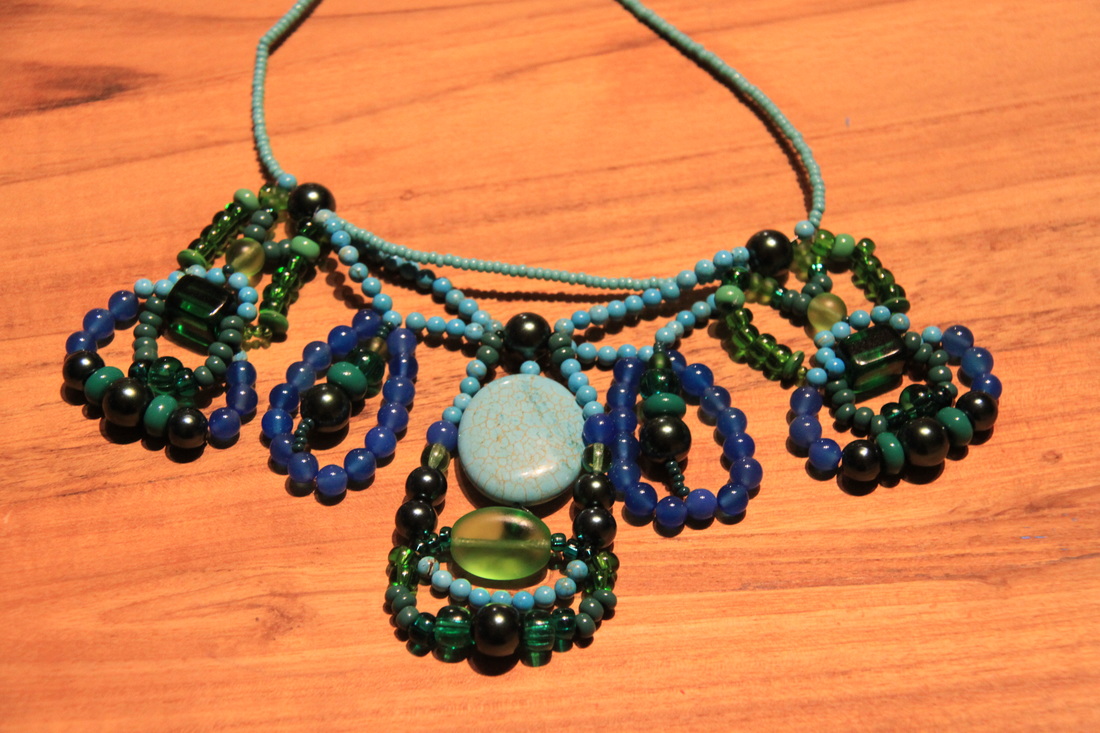
Wear responsibly and send me a photo! :)
Picture
Powered by Create your own unique website with customizable templates.