paper birds
One fine day I ask N: "So, what would you like to do today?". And, to my surprise, he answers: "I want to make a bird" (just to clarify, N doesn't speak Spanish). And we made some birds. You can, too. Here is how:
You will need:
1. Cardboard (not too thick)
2. Acrylic paint
3. Little plastic flexible piece (from your trash)
4. A feather (optional)
5. Fishing cord
6. Glue, sticky tape
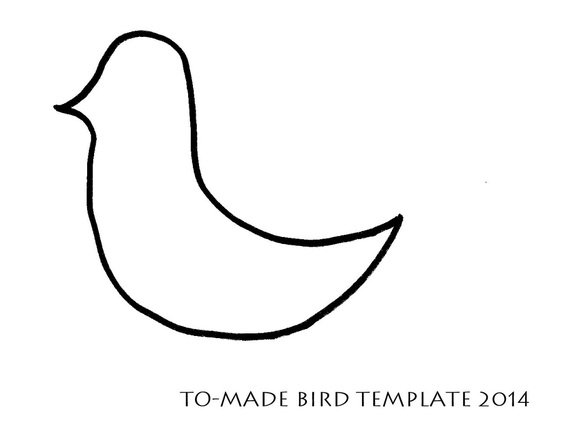
Start by drawing a bird on the cardboard and cutting it out. If you are not convinced you can draw a bird, use this template:
You will need:
1. Cardboard (not too thick)
2. Acrylic paint
3. Little plastic flexible piece (from your trash)
4. A feather (optional)
5. Fishing cord
6. Glue, sticky tape
Start by drawing a bird on the cardboard and cutting it out. If you are not convinced you can draw a bird, use this template:
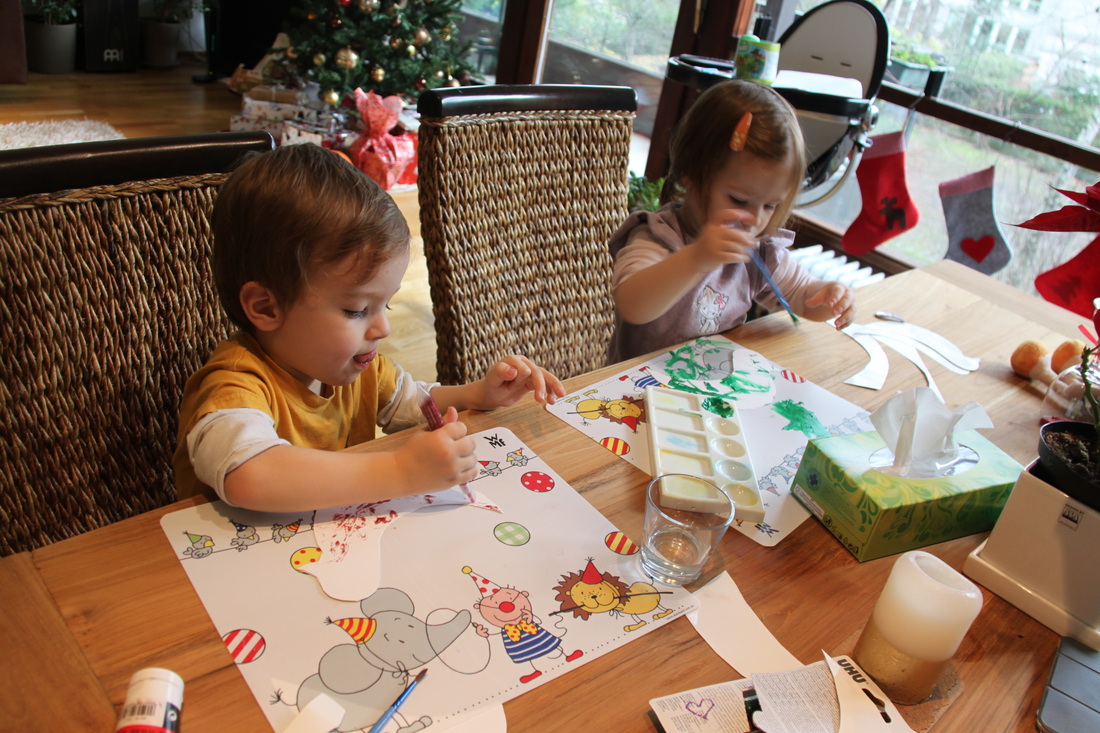
Then, employ little dwarfs to colour the bird. We used two templates per bird, coloured them and glued them together afterwards. It allows both sides to be painted without waiting for one of them to dry. Technique for impatient people.
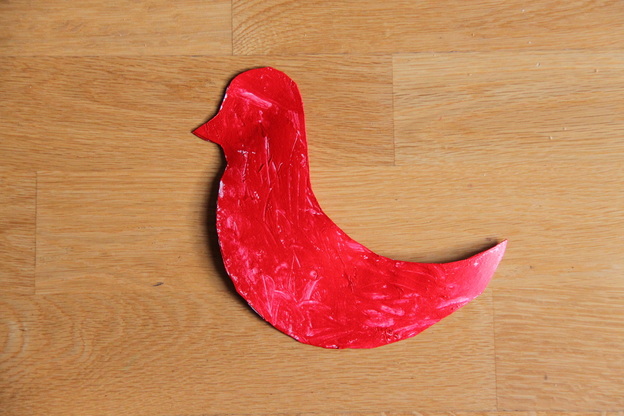
Glue together your bird, add glitter (optional) and let dry:
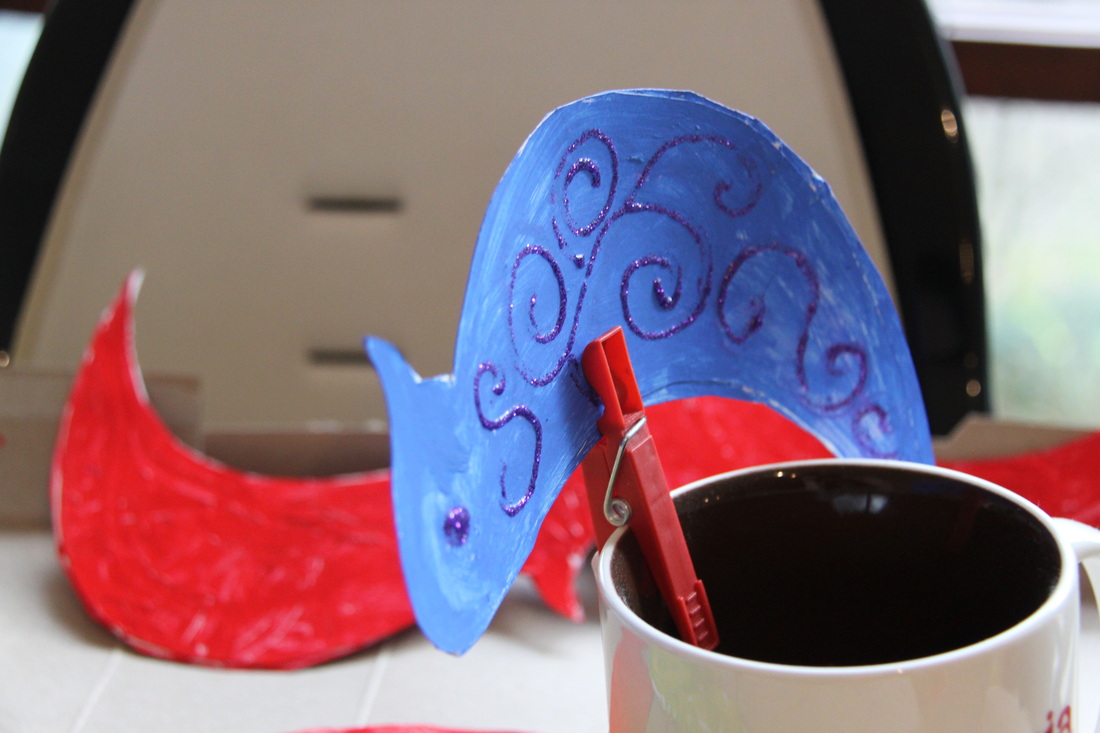
Once dry, your bird should be ready for its wings:
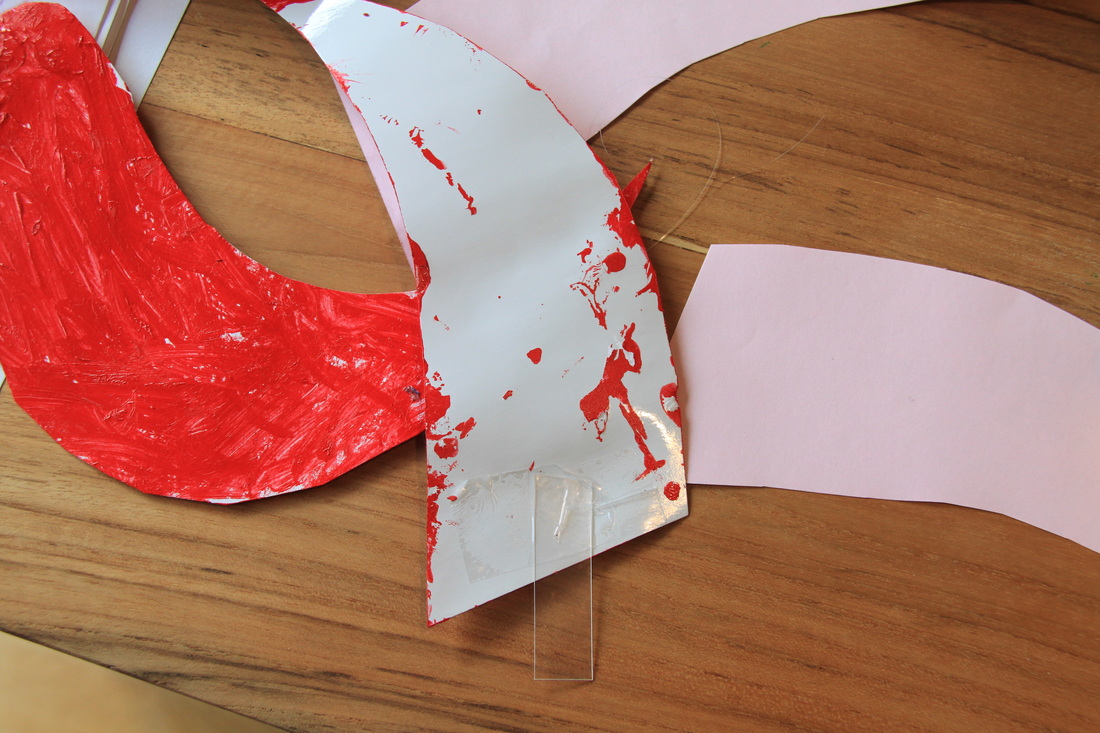
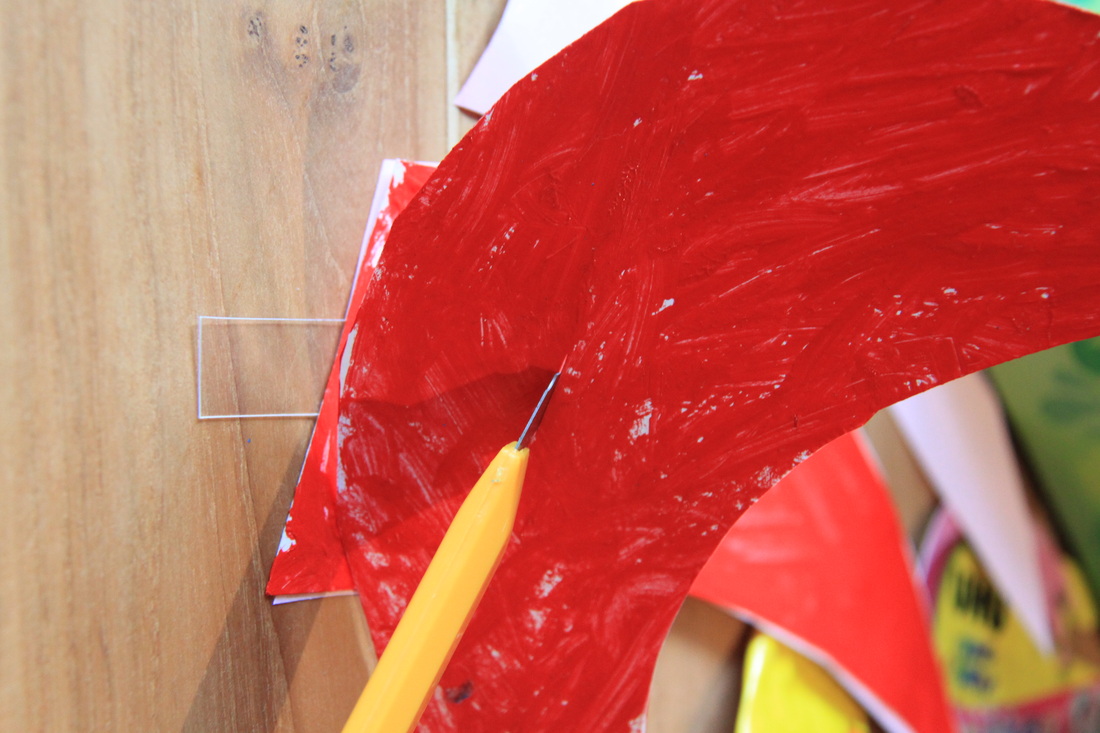
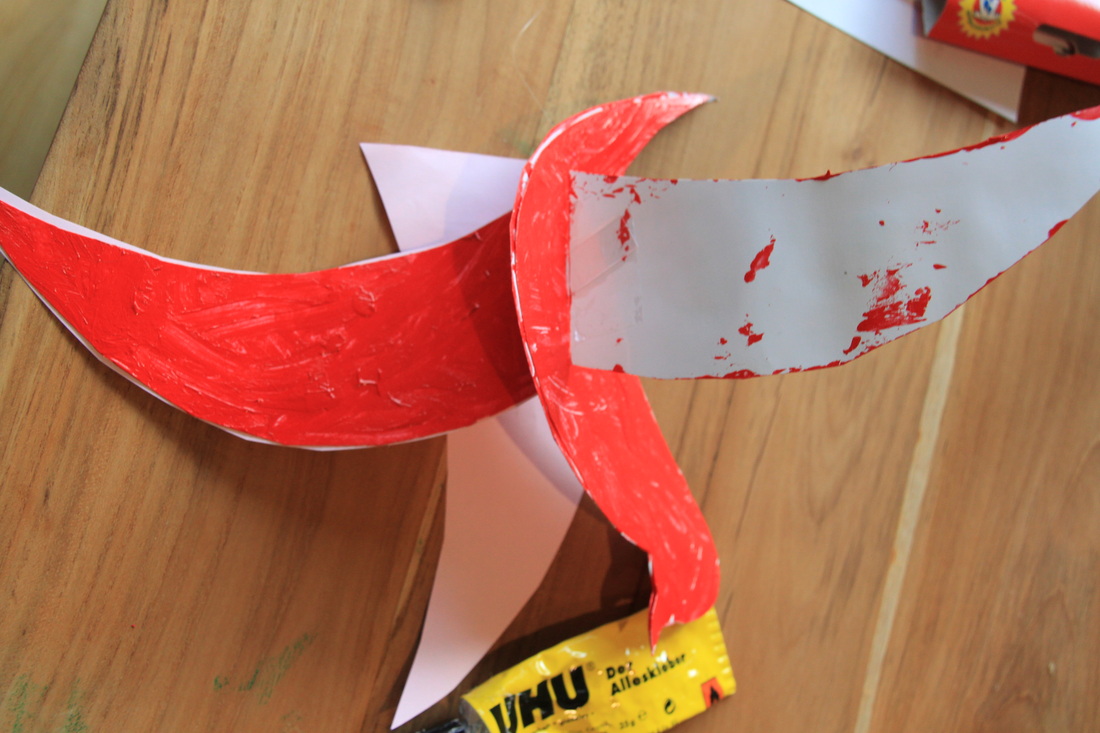
So cut cardboard in the shape of wings. You will need two pieces for the left (one top, one bottom), and two for the right wing. Colour/ decorate on the visible side. Stick the little plastic piece to the bottom of the left wing, make a tiny cut in the bird and pass the plastic through it. Then stick it to the bottom of the right wing. Now you can glue the tops of the wings.

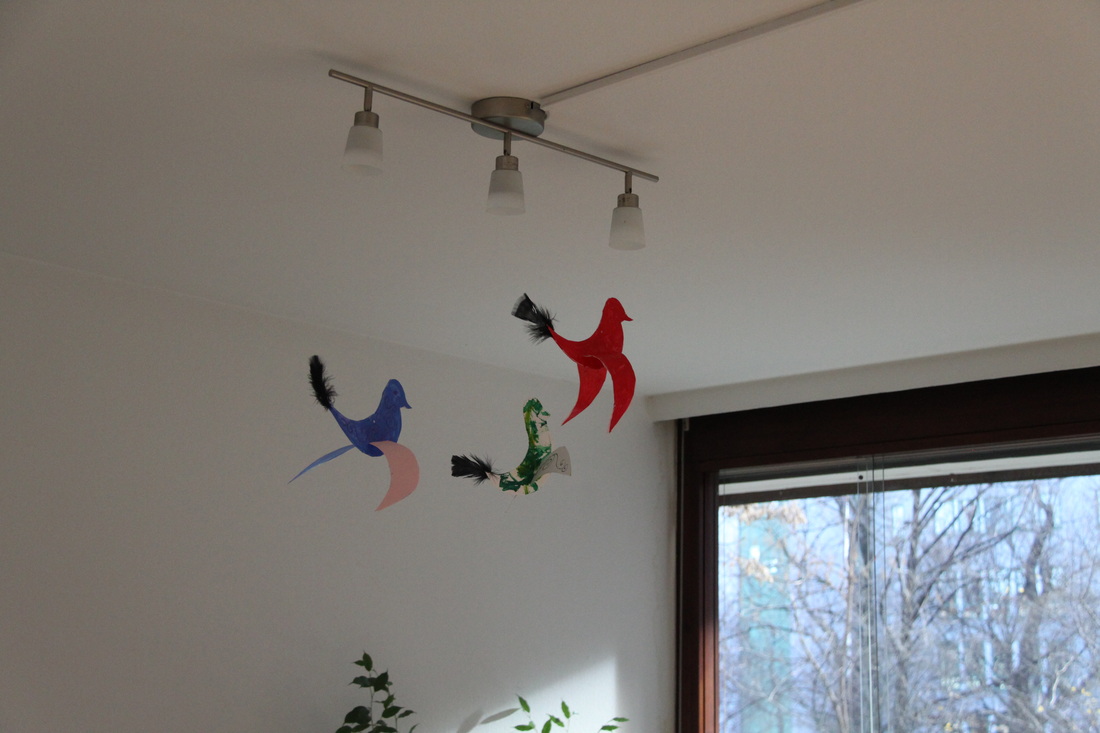
Now, you can glue a little feather on the tail of your bird, and attach it with fishing cord to the ceiling. Your bird is ready to fly!
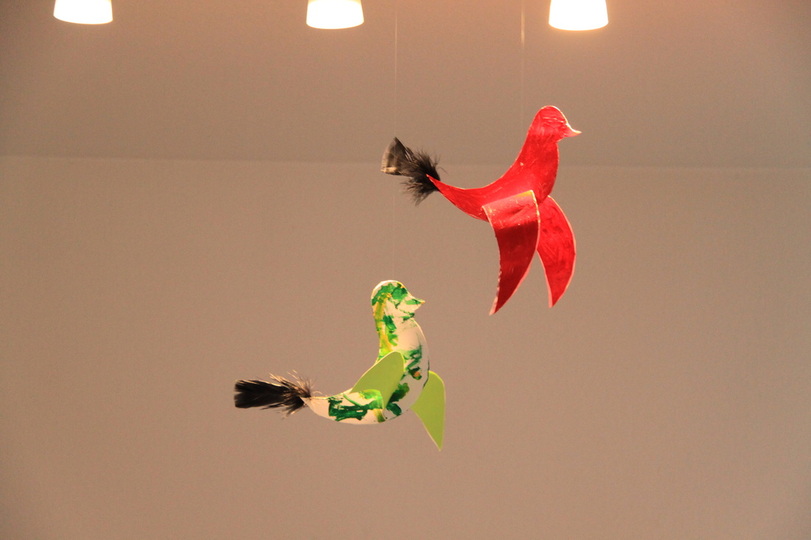
We put ours up just "for a little bit", but we liked them so much they have been flying for a month now. They bring such a happy feeling, we decided to keep them for now. Until they fly away one day :)
Happy crafting and enjoy your birds!
